OJ判题系统笔记
OJ系统需求分析
用户:选择题目,编写代码提交代码
系统(服务):
1、用户提交代码
2、出题人设置值的答案=>判断用户的提交结果是否正确
要求:
1、安全性:不能让用户随便引包、遍历、暴力破解
2、判断过程异步,提交判断直接出结果等待中,需要用户刷新页面再获取结果信息=>提交记录+结果记录
3、结果记录,要包含运行结果和运行信息(满足时间、空间限制)
OJ系统项目调研
调研项目(可以列出从github上找到的仓库地址)
原有功能
1、题目浏览
2、在线做题
3、在线提交
4、判题
普通测评:用户输入:1,标准答案:2=>交给判题服务,判题服务逻辑:执行用户代码+输出=>结果,结果和标准答案对比,一致,正确(比对文件是否一致)
特判测评:用户输入:1,标准答案:>0或<2都正确
交互测评:用户输入,测评输出,用户再输出,测评再输出,可以多次输入输出
5、显示结果
可扩展功能
1、支持多种语言
2、远程评测(Remote Judge)
3、统计分析用户判题记录
4、权限校验
核心功能
1、权限校验
2、代码沙箱
用户代码不会影响到沙箱之外系统的执行(防止用户代码藏毒)
限制用户占用内存(无限for循环,疯狂new对象是不被允许的)
3、判题规则
4、任务调度(用户请求排队,一个一个执行)
项目模块
1、题目模块
增删改题目(管理员)
查题目(管理员+用户)
做题、提交代码(用户)
2、用户模块
登录
注册
3、判题模块
提交判题(结果是否正确)
错误处理(内存溢出、安全性、超时)
4、沙箱模块(提供一个独立服务)
架构设计
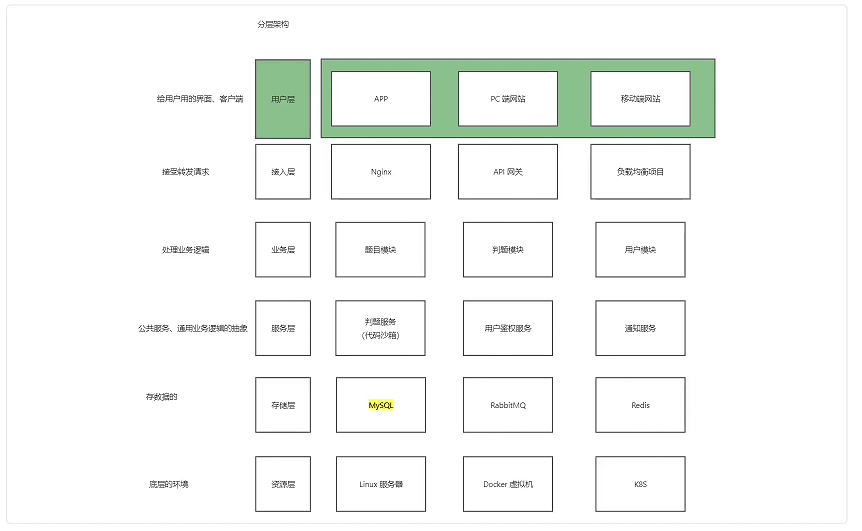
分几层,每层要实现的功能
实现方案
1、拉取现成的代码,自己部署
2、用现成的判题API,现成的代码沙箱
3、自主开发
4、用AI来做代码沙箱
5、模拟爬虫,打开别人的OJ系统,输入用户信息,再用爬虫把结果爬回来,给用户返回
OJ系统涉及技术
前端:
vue3
Arco Design组件库
在线代码编辑器
在线文档浏览
后端:
java进程控制
java安全管理器
docker
springcloud
消息队列
OJ系统业务流程图
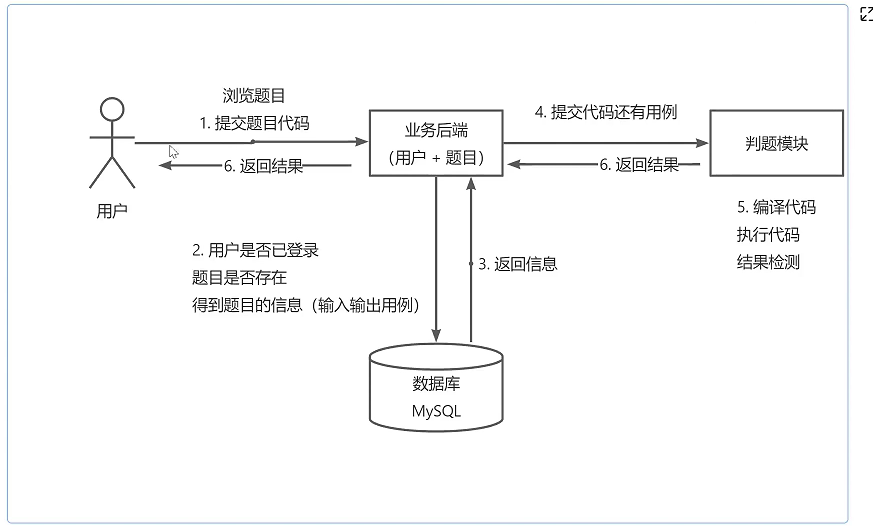
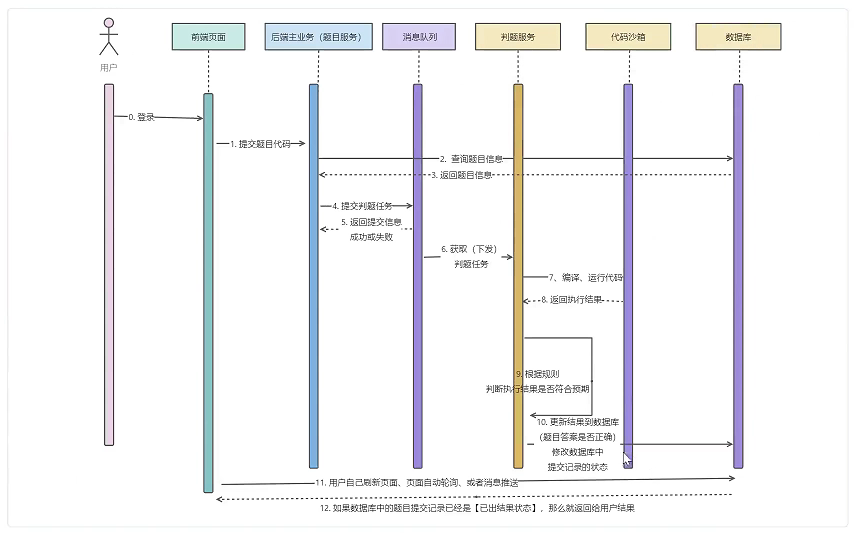
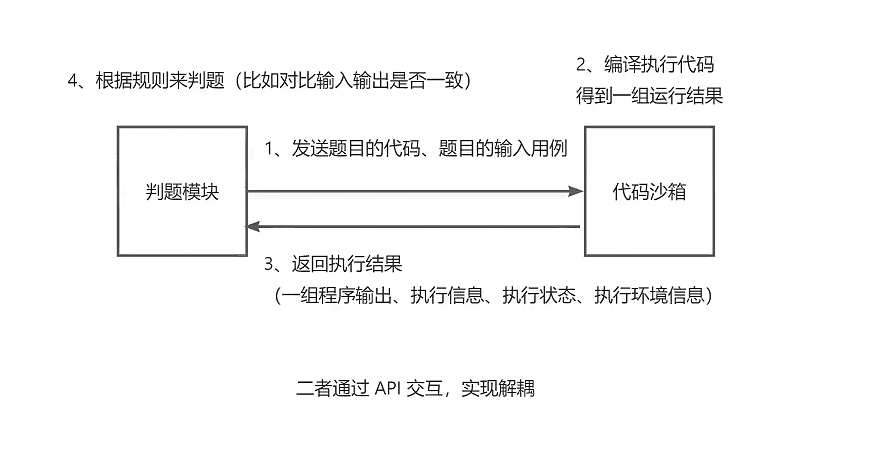
判题服务:判断用户答案是否正确
沙箱服务:隔离提交代码和系统代码(安全性),运行提交代码,产生结果
前端
前端环境
node环境:18.16.0
npm版本:9.5.1
检查指令
node -v
npm -v
前端项目初始化
npm install -g @vue/cli
vue create oj-frontend
运行项目
npm run serve
可以关闭eslint校验,在vue.config.js中
const { defineConfig } = require("@vue/cli-service");
const MonacoWebpackPlugin = require("monaco-editor-webpack-plugin");

module.exports = defineConfig({
  transpileDependencies: true,
  lintOnSave: false, // 关闭校验
  chainWebpack(config) {
    config.plugin("monaco").use(new MonacoWebpackPlugin());
  },
});
Arco Design
1、安装
npm install --save-dev @arco-design/web-vue
2、完整引入(main.js)
import { createApp } from 'vue'
import ArcoVue from '@arco-design/web-vue'; // 组件
import App from './App.vue';
import '@arco-design/web-vue/dist/arco.css'; // 样式

const app = createApp(App);
app.use(ArcoVue); // 使用
app.mount('#app');
组件
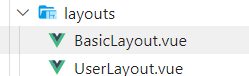
1、项目布局(layout)
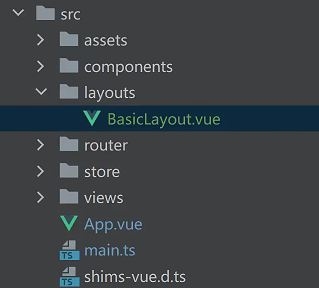
可以做多种布局
2、全局头部(GlobalHeader)
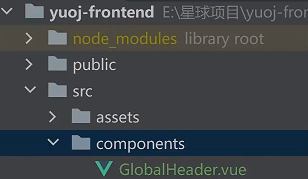
实现功能:
1、根据路由改变导航栏样式,刷新,导航栏样式不变
vuex
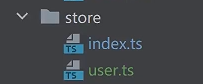
实现功能:仓库存储username信息,golobalheader渲染信息
权限管理
实现功能:路由里面的meta中acess==admin的页面(仅管理员可见的页面),用户是管理员,展示,普通用户,隐藏且点击之后跳转到404(无权限)页面。(globalheader页面实现)
不能用v-for+v-if去条件渲染遍历,相当于两个嵌套for循环
正确做法:写一个计算属性把满足权限的路由过滤出来,页面直接展示满足权限的路由。
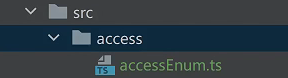
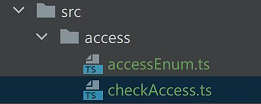
权限类型枚举类文件accessEnum
权限通用方法checkAccess
前后端联调
自动生成前端请求代码的工具
建议所有英文的网站都用google的沉浸式翻译搞,看起来很快
仓库地址:https://github.com/ferdikoomen/openapi-typescript-codegen
1、使用方法
安装axios
npm install axios
安装代码生成器
npm install openapi-typescript-codegen --save-dev
生成代码
openapi --input http://localhost:8101/api/v2/api-docs --output ./generated --client xhr
搞完这个request不用写了,直接写仓库的代码获取数据就完事了
自定义参数请求(OpenAPI)
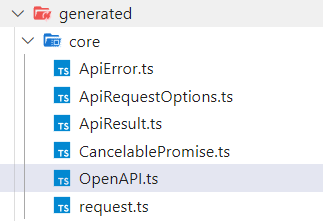
export const OpenAPI: OpenAPIConfig = {
    BASE: 'http://localhost:8101', // 请求路径
    VERSION: '1.0',
    WITH_CREDENTIALS: true,
    CREDENTIALS: 'include',
    TOKEN: undefined,
    USERNAME: undefined,
    PASSWORD: undefined,
    HEADERS: undefined,
    ENCODE_PATH: undefined,
};
整合MarkDown编辑器
在github上搜bytemd,这是一个开源框架。
网址:https://github.com/bytedance/bytemd
整合monaco-editor代码编辑器
网址:https://github.com/microsoft/monaco-editor
windows系统拉取前端代码报错问题解决步骤
git config --global core.autocrlf false
配置好后再拉取
已拉取的,出现问题的代码,全局格式化,删掉node_modules 重新npm i
当然也可以选择直接关闭eslint校验,配置项在vue.config.js
const { defineConfig } = require("@vue/cli-service");
const MonacoWebpackPlugin = require("monaco-editor-webpack-plugin");

module.exports = defineConfig({
  transpileDependencies: true,
  lintOnSave: false, // 关闭elsint校验
  chainWebpack(config) {
    config.plugin("monaco").use(new MonacoWebpackPlugin());
  },
});
后端
后端初始化工作(springboot-init)
1、全局替换springboot-init
ctrl+shift+f(不好使)全局搜索
edit---find----find in file
ctrl+shift+r 全局替换,替换成oj_snowyee_backend
全局替换报名
替换包名shift+f6
2、创建数据库,执行sql创建表,修改数据库datasource的配置,测试接口
建表
1、user表,使用鱼皮自带的user功能已够
create table if not exists user
(
    id           bigint auto_increment comment 'id' primary key,
    userAccount  varchar(256)                           not null comment '账号',
    userPassword varchar(512)                           not null comment '密码',
    unionId      varchar(256)                           null comment '微信开放平台id',
    mpOpenId     varchar(256)                           null comment '公众号openId',
    userName     varchar(256)                           null comment '用户昵称',
    userAvatar   varchar(1024)                          null comment '用户头像',
    userProfile  varchar(512)                           null comment '用户简介',
    userRole     varchar(256) default 'user'            not null comment '用户角色:user/admin/ban',
    createTime   datetime     default CURRENT_TIMESTAMP not null comment '创建时间',
    updateTime   datetime     default CURRENT_TIMESTAMP not null on update CURRENT_TIMESTAMP comment '更新时间',
    isDelete     tinyint      default 0                 not null comment '是否删除',
    index idx_unionId (unionId)
) comment '用户' collate = utf8mb4_unicode_ci;
2、题目表
| 字段 | 字段含义 |
|---|---|
| 题目标题 | |
| 题目内容 | 存放题目介绍、输入输出提示、描述、详情 |
| 题目标签(json数组) | 栈、队列、链表、简单、中等、困难 |
| 题目答案 | 管理员/用户设置的标准答案 |
| 提交数 | |
| 通过题目的人数 | |
| 判题配置(judgeConfig)(json对象) | 时间限制(timeLimit)、内存限制(memoryLimit) |
| 判题用例(judgeCase)(json数组) | 输入用例(input)、输出用例(output) |
题目内容字段注意:
不是很复杂,可以直接存到数据库中
用例文件比较大,>512kb建议单独放到一个文件中,数据库只保存文件的url地址
判题配置不拆开多个字段而是存成判题配置一个字段的原因:
不是很了解配置是否会增加修改,为了后期方便修改
这些配置不会用于查找数据
-- 题目表
create table if not exists question
(
    id         bigint auto_increment comment 'id' primary key,
    title      varchar(512)                       null comment '标题',
    content    text                               null comment '内容',
    tags       varchar(1024)                      null comment '标签列表(json 数组)',
    answer     text                               null comment '题目标案答案',
    submitNum   int      default 0                null comment '题目提交数',
    acceptedNum int      default 0                null comment '题目通过数',
    judgeCase  text                               null comment '判题用例(json 数组)',
    judgeConfig text                              null comment '判题配置(json 对象)',

    thumbNum   int      default 0                 not null comment '点赞数',
    favourNum  int      default 0                 not null comment '收藏数',
    userId     bigint                             not null comment '创建用户 id',
    createTime datetime default CURRENT_TIMESTAMP not null comment '创建时间',
    updateTime datetime default CURRENT_TIMESTAMP not null on update CURRENT_TIMESTAMP comment '更新时间',
    isDelete   tinyint  default 0                 not null comment '是否删除',
    index idx_userId (userId)
) comment '帖子' collate = utf8mb4_unicode_ci;
3、题目提交表(存放判题结果)
| 字段 | 字段含义 |
|---|---|
| 提交用户id | |
| 题目id | |
| 提交代码code | |
| 语言language | |
| 判题状态status | 0 - 待判题、1 - 判题中、2 - 成功、3 - 失败 |
| 判题信息judgeInfo | 判题过程中得到的一些信息,比如程序失败的原因、程序执消耗的时间、空间 |
judgeInfo
{
    "message":"判题信息",
    "time":1000, // 单位ms
    "memory":1000, // 单位kb
}
判题信息枚举
Accepted 成功
Wrong Answer 答案错误
Compile Error 编译错误
Memory Limit Exceeded 内存溢出
Time Limit Exceeded 超时
Presentation Error 展示错误(多空格之类的)
Output Limit Exceeded输出溢出
Waiting 等待中
Dangerous Opetation 危险操作
Runtime Error 运行错误(用户程序运行出现问题)
System Error 系统错误(做系统的人的问题)
-- 题目提交表
create table if not exists qustion_submit
(
    id         bigint auto_increment comment 'id' primary key,
    language   varchar(256)                       not null comment '编程语言',
    code       text                               not null comment '提交代码',
    judgeInfo  text                               null comment '判题信息',
    status     varchar(256)                       not null comment '判题状态(0 - 待判题、1 - 判题中、2 - 成功、3 - 失败)',
    questionId bigint                             not null comment '题目 id',
    userId     bigint                             not null comment '创建用户 id',
    createTime datetime default CURRENT_TIMESTAMP not null comment '创建时间',
    updateTime datetime default CURRENT_TIMESTAMP not null on update CURRENT_TIMESTAMP comment '更新时间',
    isDelete   tinyint  default 0                 not null comment '是否删除',
    index idx_userId (userId)
) comment '题目提交表' collate = utf8mb4_unicode_ci;
小Tip:
什么情况下适合加索引?如何选择哪个字段加索引?
索引类似于书籍的目录,通过索引可以快速定位数据。
什么情况适合加索引呢,比如经常出现在where中的列,用于连接(join)、排序(group by)、聚合的列(count avg),因为这些列经常被查找,分类又比较多,加上索引可以加快查找速度。
那么什么情况不适合加索引呢,频繁更新的列,分类比较少的列,比如性别,只有男女,加索引没多大意义,宽字符列,因为很长的字符串需要比对太耗时,很可能查询的速度不增反降。
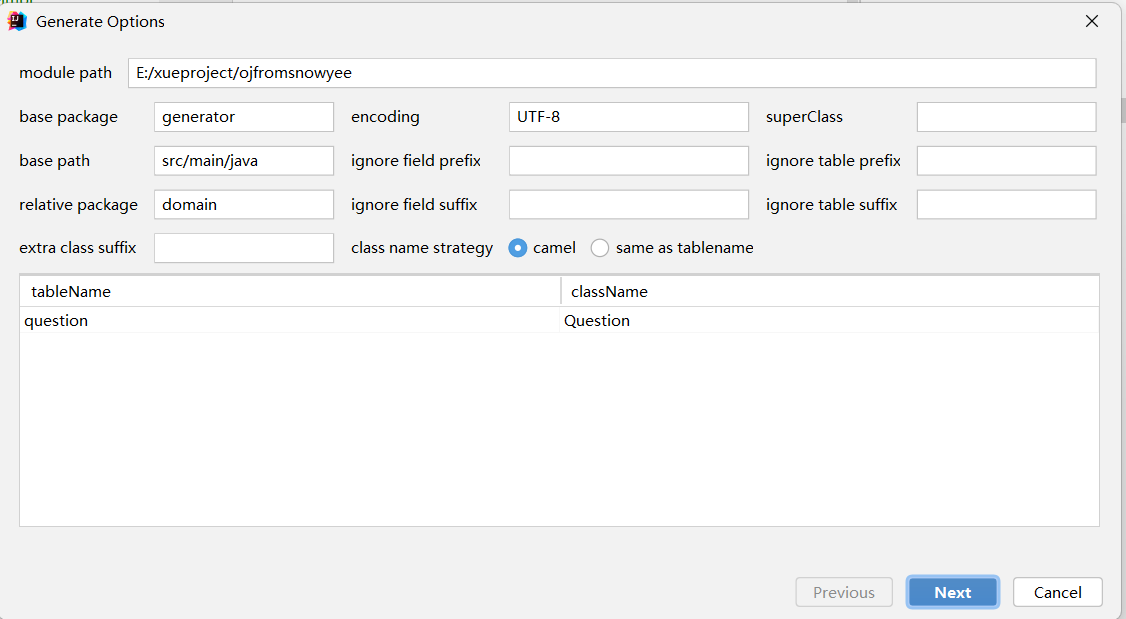
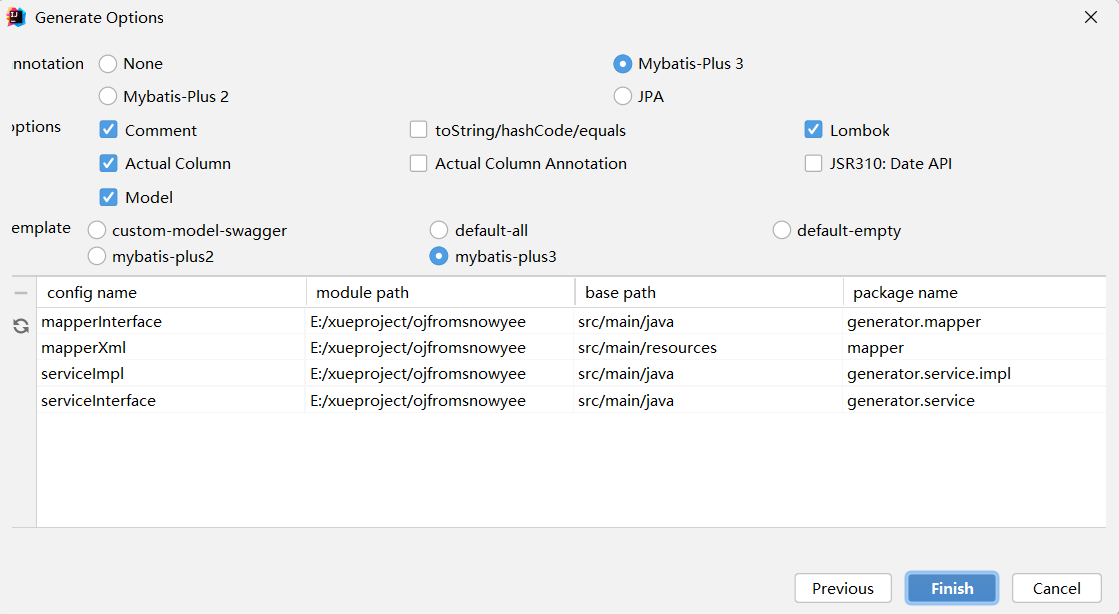
MybatisX生成代码
1、安装mybatisX插件
2、生成代码(配置)
后端crud流程梳理
1、数据库表设计
2、用mybatisX生成mapper和service层的基本代码
是需要编写controller和service层的代码的
具体代码需要参考一下question(单表)、question_submit(关联表)
需要参考的代码、controller、service(I,Impl)、dto(请求用的,注意某个字段是json的,需要单独封装成一个类)、vo、enums(枚举类)
DTO:封装前端请求需要的字段对象,json需要单独封装成一个类
VO:返回给前端的字段,可以只返回部分字段,需要有objtoVo的功能类,主要是把实体类转换成对应的vo对象,但是需要注意的是,json字段需要特殊处理
Enity(实体类):这个是mybatis自动生成的,直接对应数据库的库表信息
3、编写controller层,实现基本的crud和权限校验等功能
需要自己写的service功能
1、校验,确定哪些不能为空,长度不能超过多少之类
2、获取查询包装类(根据前端提交的对象,生成querywrapper)
3、获取题目封装,分页获取题目封装(封装的只展示部分字段)
4、根据业务逻辑去开发新功能代码
判题模块和代码沙箱的关系
快捷创建接口的测试类
选中接口名称+alt+enter

代码沙箱
实际操作

把需要运行的程序放到testCode文件夹下,实际执行指令
出现问题,无法运行程序
我的命令行显示乱码
解决方案一:
windows系统打开高级系统设置

之后再执行java Main 1 1指令,正常显示
在任何目录下,不用配置环境变量,测试运行成功指令
javac -encoding utf-8 C:\Users\19457\Desktop\testcode\Main.java
java -Dfile.encoding=UTF-8 -cp C:\Users\19457\Desktop\testcode Main 1 2
C:\Users\19457\Desktop\testcode\Main.java为java文件的全路径
保证编译时使用utf-8,不出现中文乱码-encoding utf-8
保证运行时使用utf-8,不出现中文乱码-Dfile.encoding=UTF-8
核心流程实现
用程序代替人工,操作名命令行,编译执行代码
1、把用户的代码保存为文件
2、编译代码,得到class文件
3、执行代码,得到输出结果
4、收集整理输出结果
收集运行时间的方法
StopWatch stopWatch = new StopWatch();
stopWatch.start();
stopWatch.stop();
stopWatch.getLastTaskTimeMillis();
收集命令行信息的utils方法
public static ExecuteMessage getProcessMessage(String runCmd,String opName) {
        ExecuteMessage executeMessage = new ExecuteMessage();
        StopWatch stopWatch = new StopWatch();
        // 收集运行指令后的信息
        try {
            stopWatch.start();
            Process runProcess = Runtime.getRuntime().exec(runCmd);
            // 指令正常执行,获取错误码
            int exitValue = runProcess.waitFor();
            executeMessage.setExitValue(exitValue);
            // 正常退出
            if (exitValue == 0){
                System.out.println(opName+"成功");

                // 分批获取进程的输出
                BufferedReader bufferedReader = new BufferedReader(new InputStreamReader(runProcess.getInputStream()));
                StringBuilder compileOutputStringBuilder = new StringBuilder();
                // 逐行获取
                String compileOutputLine;
                while((compileOutputLine = bufferedReader.readLine()) != null){
                    compileOutputStringBuilder.append(compileOutputLine);
                }
                executeMessage.setMessage(compileOutputStringBuilder.toString());
            }else {
                System.out.println(opName+"失败, 错误码" + exitValue);
                // 分批获取进程的输出
                BufferedReader bufferedReader = new BufferedReader(new InputStreamReader(runProcess.getInputStream()));
                StringBuilder compileOutputStringBuilder = new StringBuilder();
                // 逐行获取
                String compileOutputLine;
                while((compileOutputLine = bufferedReader.readLine()) != null){
                    compileOutputStringBuilder.append(compileOutputLine);
                }
                executeMessage.setMessage(compileOutputStringBuilder.toString());
                // 分批获取进程的输出
                BufferedReader errorBufferedReader = new BufferedReader(new InputStreamReader(runProcess.getInputStream()));
                StringBuilder errorCompileOutputStringBuilder = new StringBuilder();
                // 逐行获取
                String errorCompileOutputLine;
                while((errorCompileOutputLine = errorBufferedReader.readLine()) != null){
                    errorCompileOutputStringBuilder.append(errorCompileOutputLine);
                }
                executeMessage.setErrorMessage(errorCompileOutputStringBuilder.toString());
                stopWatch.stop();
                executeMessage.setTime(stopWatch.getLastTaskTimeMillis());
            }

        } catch (IOException | InterruptedException  e ) {
            e.printStackTrace();
        }
        return executeMessage;
    }
5、文件清理
6、错误处理,提升程序健壮性
安全性考虑
1、故意占用时间资源,导致程序卡死
解决思路:开启一个新线程,监控运行线程时间,超时则关闭
2、故意占用内存资源,导致内存溢出
解决思路:执行命令加-Xmx 256m 限制程序执行的最大内存
3、读取程序隐私文件,导致信息泄露
4、向服务器写入木马程序
5、运行木马程序
6、执行高危操作,比如删除服务器所有文件、获取服务器所有文件等等..
解决思路一:对要执行的code,进行关键词匹配,如果有exec、write、等危险操作,直接return null
关键词匹配可以用HuTool工具库的WordTree,不用自己写字典树
字典树数据结构原理:
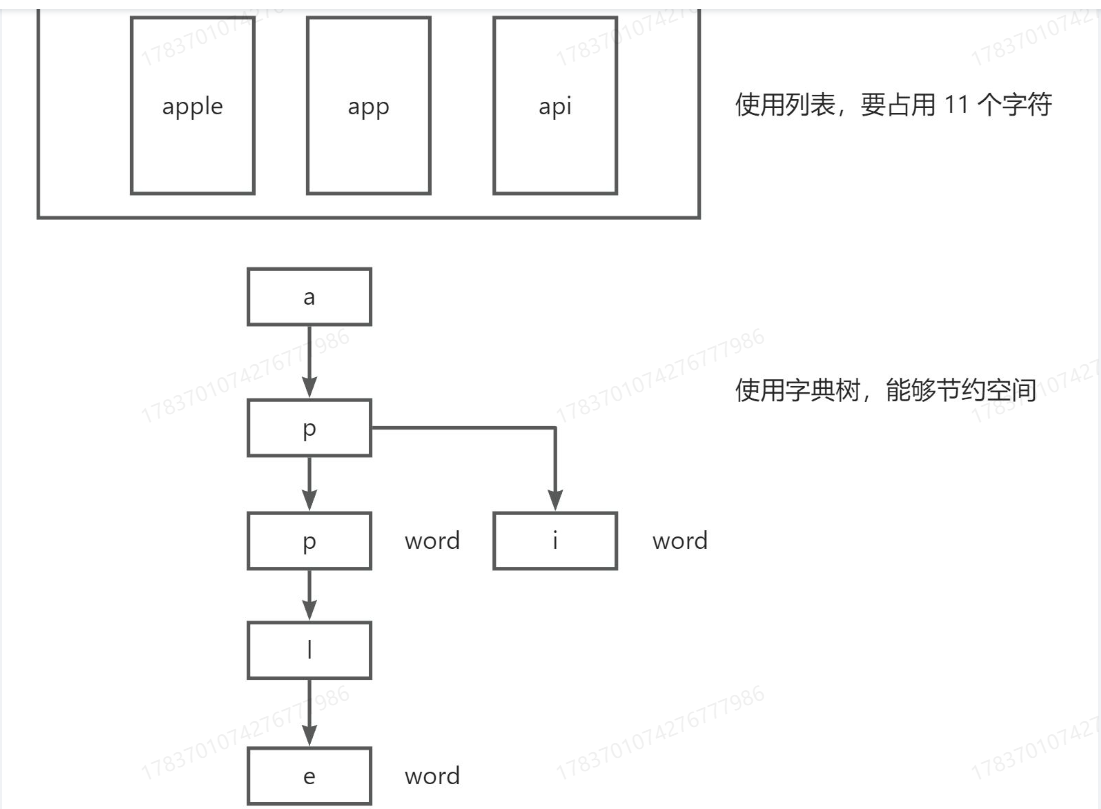
缺点:无法遍历所有黑名单,不同语言,关键词限制是不一样的,人工成本很大
解决思路二:使用java安全管理器
步骤
1、写限制程序
package com.snowyee.snowyeecodesandbox.security;

/**
 * 禁用所有权限安全管理器
 */
public class DenySecurityManager extends MySecurityManager{

    @Override
    public void checkPermission(java.security.Permission perm) {
        throw new SecurityException("Sorry, you do not have permission to do this." + perm.toString());
    }
}
限制读checkRead
限制写checkWrite
限制执行checkExec
限制网络连接权限checkConnect
2、编译
执行javac命令编译成class文件
3、执行命令使用
linux系统用: windows系统用;
securityPath为MySecurityManager编译后的包名
String runCmd = String.format("java -Xmx256m -Dfile.encoding=UTF-8 -cp %s;%s -Djava.security.manager=MySecurityManager Main %s",userCodeParentPath,securityPath,inputArgs);
缺点:需要一个一个判断哪些文件,包名允许读写,哪些不允许,很费劲
安全问题的最终解决方案
使用容器技术,和宿主机隔离
安装部分文档参考:
https://blog.csdn.net/qq_52495761/article/details/134489762
Docker实现代码沙箱
实现思路:docker负责运行java程序,并得到结果。
实现流程:
1、把用户的代码保存为文件
2、编译代码得到class文件
3、把编译好的文件上传到容器环境内(用java操作docker)
4、在容器中执行代码,得到输出结果
示例执行
docker exec eloquent_goodall java -cp /app Main 1 3
5、收集整理输出的结果
6、文件清理,释放空间
7、错误处理,提升程序健壮性
项目部署
后端部署
我比较熟悉docker技术,使用docker技术进行部署。
1、打包项目
点击maven的package
2、写Dockerfile文件,写到项目里
code-sandbox项目
# 基础镜像使用java
FROM java:8
# 作者
MAINTAINER snowyee
# VOLUME 指定临时文件目录为/tmp,在主机/var/lib/docker目录下创建了一个临时文件并链接到容器的/tmp
VOLUME /tmp
# 将jar包添加到容器中并更名为zzyy_docker.jar
ADD snowyee-code-sandbox-0.0.1-SNAPSHOT.jar snowyee-code-sandbox.jar
# 运行jar包
RUN bash -c 'touch /snowyee-code-sandbox.jar'
ENTRYPOINT ["java","-jar","/snowyee-code-sandbox.jar"]
#暴露8801端口作为微服务
EXPOSE 8801
oj_snowyee_backend项目
# Docker 镜像构建
# @author <a href="https://www.snowyee.cn">程序媛雪儿</a>
FROM maven:3.8.1-jdk-8-slim as builder
# 作者
MAINTAINER snowyee
# VOLUME 指定临时文件目录为/tmp,在主机/var/lib/docker目录下创建了一个临时文件并链接到容器的/tmp
VOLUME /tmp
# 将jar包添加到容器中并更名为zzyy_docker.jar
ADD oj_snowyee_backend-0.0.1-SNAPSHOT.jar oj_snowyee_backend.jar
# 运行jar包
RUN bash -c 'touch /oj_snowyee_backend.jar'
ENTRYPOINT ["java","-jar","/oj_snowyee_backend.jar"]
#暴露8801端口作为微服务
EXPOSE 8802
3、生成Docker镜像
docker build -t snowyee-code-sandbox:1.1 .
docker build -t oj_snowyee_backend:1.1 .
4、开放端口
如果是买的服务器,配置安全组的访问规则入方向
5、启动容器实例
docker run -d -p 8801:8801 snowyee-code-sandbox:1.1
docker run -d -p 8802:8802 oj_snowyee_backend:1.1
6、测试并查看日志是否启动成功
docker logs 容器id
前端部署
1、项目打包
执行命令
npm run build
2、nginx配置代理使得项目可以访问,代理配置两个,一个是访问到前端路径,一个是帮助前端项目访问后端接口的代理。
        location /third {
            alias /srv/pkthinkertothirdparty;
            index index.html;
        }

    ## 失去了vue.config.js proxy代理服务就失去了作用,需要在nginx重新配置
        location /pkapi
        {
            rewrite ^.+pkapi/?(.*)$ /$1 break;
            proxy_pass http://www.snowyee.cn:8767;
        }
类似这种,具体操作和跨域问题需要查看电力知库点后端部署。
项目功能扩展
实现合并算法的判题
算法代码
class Main {
    public static void main(String[] args) {

        // 解析 `m` 和 `n`
        int m = Integer.parseInt(args[0]);
        int n = Integer.parseInt(args[1]);

        // 从参数中创建 `nums1` 和 `nums2` 数组
        int[] nums1 = new int[m + n];
        int[] nums2 = new int[n];

        // 解析 `nums1` 数组(`m` 个元素在 `m` 和 `n` 之后)
        for (int i = 0; i < m; i++) {
            nums1[i] = Integer.parseInt(args[2 + i]);
        }

        // 为了容纳 `nums2`,在 `nums1` 的末尾添加零
        for (int i = m; i < m + n; i++) {
            nums1[i] = 0;
        }

        // 解析 `nums2` 数组(在 `nums1` 之后的 `n` 个元素)
        for (int i = 0; i < n; i++) {
            nums2[i] = Integer.parseInt(args[2 + m + i]);
        }

        // 调用 merge 方法
        merge(nums1, m, nums2, n);

        // 打印合并后的数组
        for (int num : nums1) {
            System.out.print(num + " ");
        }
    }

    public static void merge(int[] nums1, int m, int[] nums2, int n) {
        // 从后往前插
        int last = n + m - 1;
        int i = m - 1;
        int j = n - 1;

        while (i >= 0 && j >= 0) {
            if (nums1[i] > nums2[j]) {
                nums1[last] = nums1[i];
                last--;
                i--;
            } else {
                nums1[last] = nums2[j];
                last--;
                j--;
            }
        }

        // nums2还有剩余
        while (j >= 0) {
            nums1[last] = nums2[j];
            last--;
            j--;
        }
    }
}
命令行执行代码
javac -encoding utf-8 C:\Users\19457\Desktop\testcode\Main.java
java -Dfile.encoding=UTF-8 -cp C:\Users\19457\Desktop\testcode Main 3 3 1 2 3 2 5 6
1 2 2 3 5 6
java -Dfile.encoding=UTF-8 -cp C:\Users\19457\Desktop\testcode Main 1 0 1
1
解决方案1:直接改输入输出用例,执行代码要写全
输入输出改成
案例1
3 3 1 2 3 2 5 6  # 输入用例
1 2 2 3 5 6 # 输出用例,必须试 1 2 2 3 5 6 6后面必须带空格,不然就会判错
案例2
1 0 1 # 输入用例
1 #输出用例,注意,1后面同理必须带空格,不然会判错
我认为这个代码对用户很不友好,用户应该只用写下面的
// 只需要写这里面的代码
public static void merge(int[] nums1, int m, int[] nums2, int n) {
        // 从后往前插
        int last = n + m - 1;
        int i = m - 1;
        int j = n - 1;

        while (i >= 0 && j >= 0) {
            if (nums1[i] > nums2[j]) {
                nums1[last] = nums1[i];
                last--;
                i--;
            } else {
                nums1[last] = nums2[j];
                last--;
                j--;
            }
        }

        // nums2还有剩余
        while (j >= 0) {
            nums1[last] = nums2[j];
            last--;
            j--;
        }
    }
我们的系统直接填满其他信息
class Main {
    public static void main(String[] args) {

        // 解析 `m` 和 `n`
        int m = Integer.parseInt(args[0]);
        int n = Integer.parseInt(args[1]);

        // 从参数中创建 `nums1` 和 `nums2` 数组
        int[] nums1 = new int[m + n];
        int[] nums2 = new int[n];

        // 解析 `nums1` 数组(`m` 个元素在 `m` 和 `n` 之后)
        for (int i = 0; i < m; i++) {
            nums1[i] = Integer.parseInt(args[2 + i]);
        }

        // 为了容纳 `nums2`,在 `nums1` 的末尾添加零
        for (int i = m; i < m + n; i++) {
            nums1[i] = 0;
        }

        // 解析 `nums2` 数组(在 `nums1` 之后的 `n` 个元素)
        for (int i = 0; i < n; i++) {
            nums2[i] = Integer.parseInt(args[2 + m + i]);
        }

        // 调用 merge 方法
        merge(nums1, m, nums2, n);

        // 打印合并后的数组
        for (int num : nums1) {
            System.out.print(num + " ");
        }
    }

    public static void merge(int[] nums1, int m, int[] nums2, int n) {

    }
}
一个比较简便的实现方案
在题目表里面加一个字段source_code,这个字段记录其他的额外信息,展示的code直接展示这个字段,题目描述里写清楚只做merge里面的信息。
项目相关信息
项目体验链接
http://www.snowyee.cn/snowyee-oj/
项目后端仓库
https://gitee.com/gu-feiyin/oj_snowyee_backend
项目前端仓库
https://gitee.com/gu-feiyin/snowyeeoj-frontend
代码沙箱仓库
https://gitee.com/gu-feiyin/snowyee-code-sandbox